
Asetek vs. Swiftech
Introduction
It is unbelievable how many people are water cooling these days. The other day, I noticed a father buying his 12 year old son a Corsair Hydrocool External Water Cooling system at Fry’s Electronics. You know water cooling is becoming mainstream when a 12 year old kid can buy a kit at Fry’s Electronics. In fact, many of our Case Modding Contest submissions have impressive water cooling systems inside (or outside) of their boxes, which proves how much of a modder’s and cooler’s dream water cooling can be. Today, we have the privilege of testing out two of the latest water blocks by two distinguished companies: Asetek and Swiftech.
Asetek
Asetek, who had been popular for quite some time for their phase-change VapoChill line, released their WaterChill line in 2003, only a year ago. Their kit included everything an end user needed to easily setup an internal water cooling system which arguably performed just as well, if not better, than some commercial or even DIY (“do it yourself”) water cooling kits massively available. By only choosing quality-known products in their kits, such as those from HWlabs and Hydor, Asetek has transformed itself into a premiere water cooling company in a short amount of time. Their dedication as a water cooling company is evident in the release of their new Universal Antarctica water block that uses the tried and true 3 barbed micro-channel design that can easily be adaptable for Socket A, 478, and 754/939 processors.

Swiftech
Unlike Asetek, who is new to the water cooling scene, Swiftech has been a well-known water cooling company since the late 90’s. Swiftech has been known for releasing kits and products that even novice water coolers can readily install. Examples of their dedication to ease of installation include their Fill and Bleed Kit, their 12v DC MCP600 pump, and their use of quick-connects on almost all of their products. They have designed new innovations, such as their patented Diamond-Pin Matrix for water cooling and their Helicoid pins for air cooling. These have won the hearts of aftermarket cooling users. Now they have released their new MCW6000 series, which utilizes a new pin design in water cooling. Today we will be looking at how the Asetek Antarctica and the MCW6000 (for Athlon 64s) stack up against each other, as well as how the end user can expect these blocks to perform against a stock air cooling solution.
Asetek Packaging and Contents
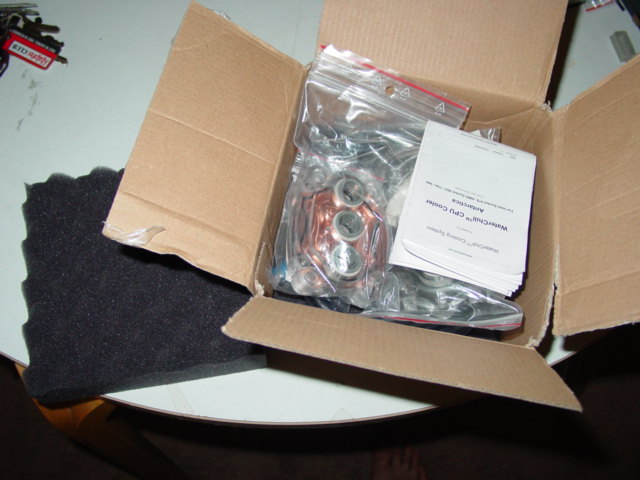
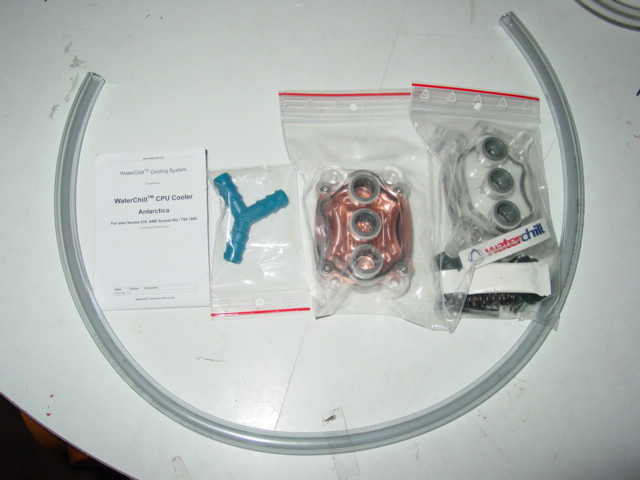
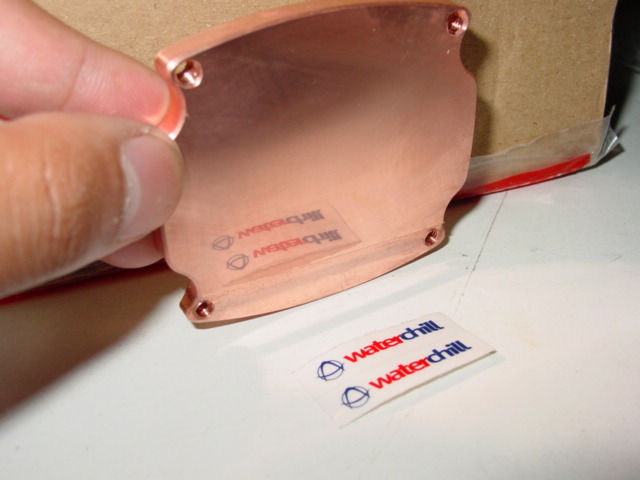
The Asetek block came very well-packaged. The entire contents are sandwiched between two thick pieces of egg crate foam and each component is well protected within its own zip-locked plastic bag. The contents include everything that is needed to warrant its “Universal” appeal. It includes the water block itself (which has the mount for Socket 754/939/478), an additional mount for Socket A, all necessary mounting hardware, a detailed instructions manual (for all platforms), about 2 feet of Tub Clair tubing, some standard silicon paste, and a Y adaptor. It even comes with extra stickers for more aesthetic appeal. Perhaps with these decals added to your setup you’ll gain faster performance out of your PC…
Asetek Mounts
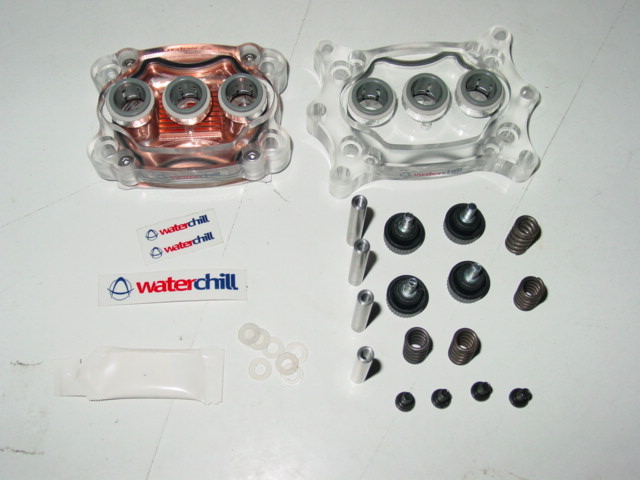
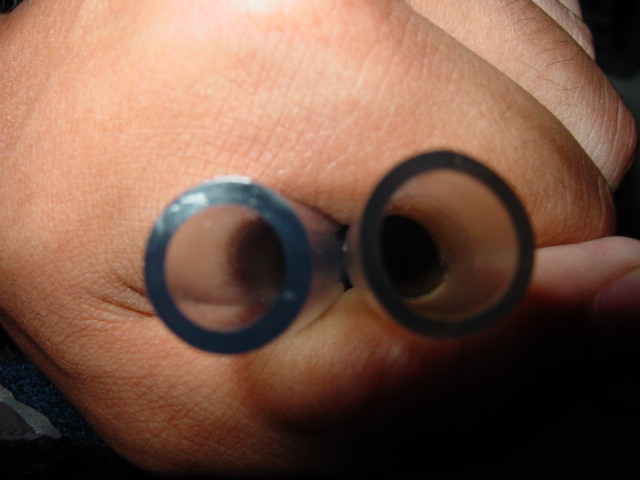
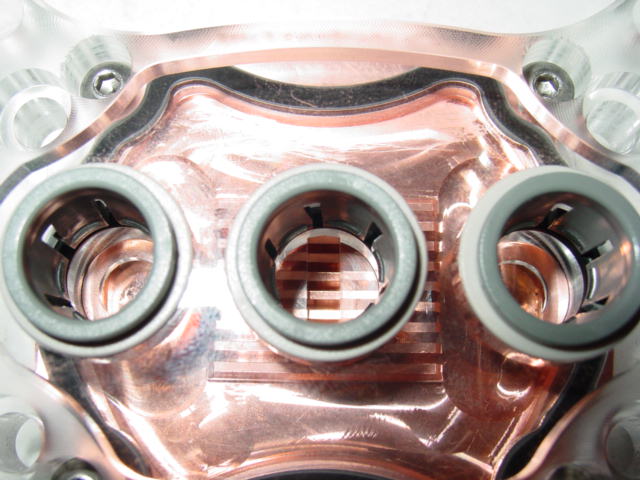
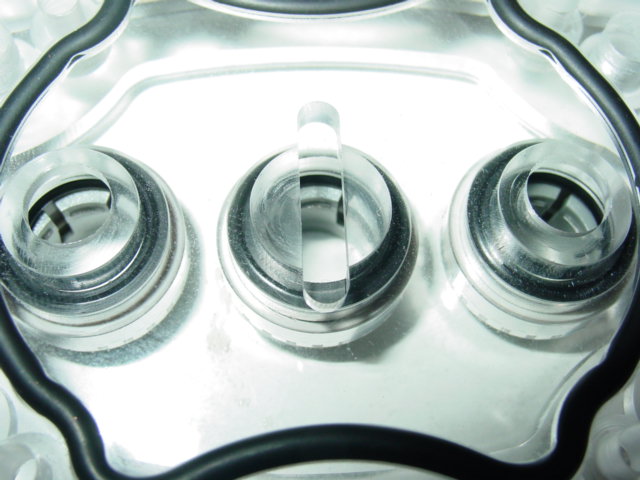
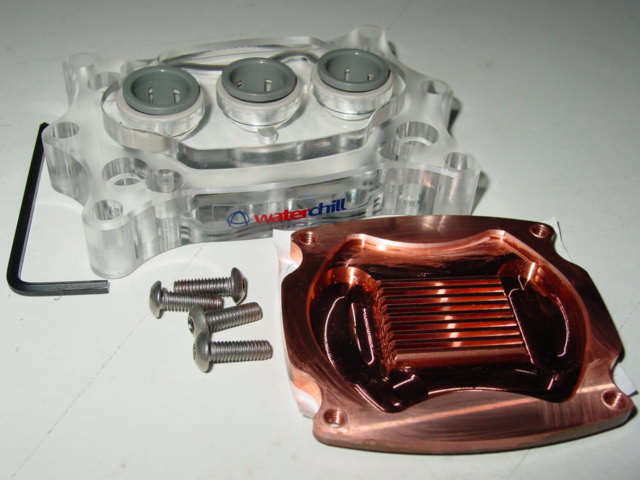
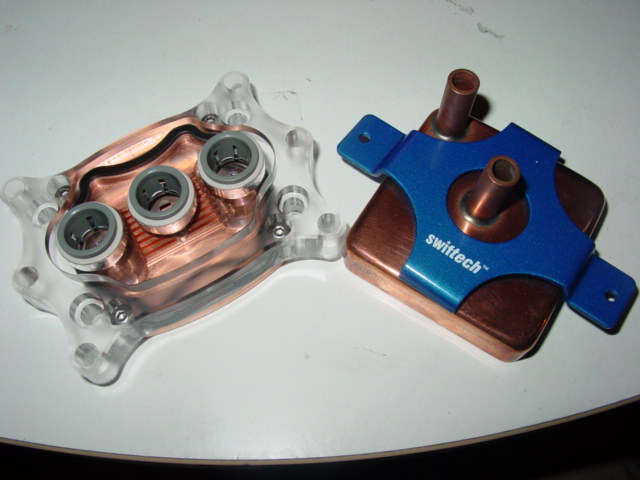
Asetek includes the required Hex key to take off the tops so you have access to switching tops and insides of the water block. The tops are crafted very well and have a rather professional-looking industrial look to them; pretty amazing for a company that hasn’t been in the water cooling industry for that long. The tops include quick connect fittings, similar to the ones found in most Swiftech parts, for 3/8” ID, 1/2” OD tubing. I did, however, come across some problems with this design. For one, you need to make sure that you purchase some thicker and more rigid tubing than tubing such as ClearFlex, MasterKleer, or Tygon. Tubing like the provided Tub Clair, or KuriTec Tubing will suffice. Placed side by side, the Tub Clair tubing, although exactly the same in specs to the MasterKleer tubing I have, appears to be smaller in ID, but thicker in OD. Be warned when using softer tubing; it will be much more difficult to push the tubing into the quick connects on the tops. Looking closer at the mount reveals a slightly smaller slit at the inlet than the outlet, which causes the water to enter at greater velocity. Similar concepts have been seen in existing 3 barbed blocks already on the market.
Asetek Block
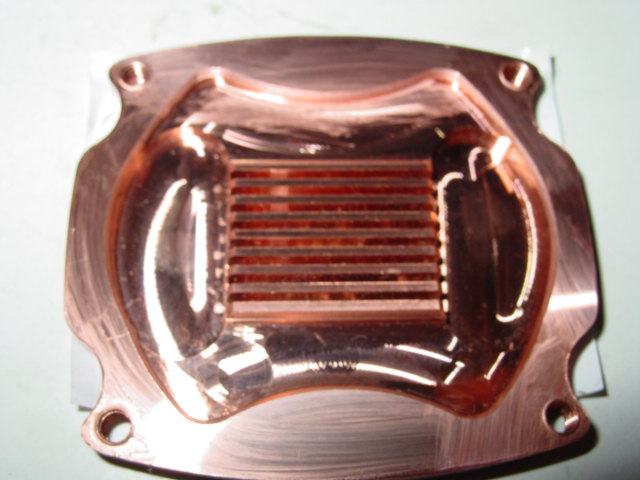
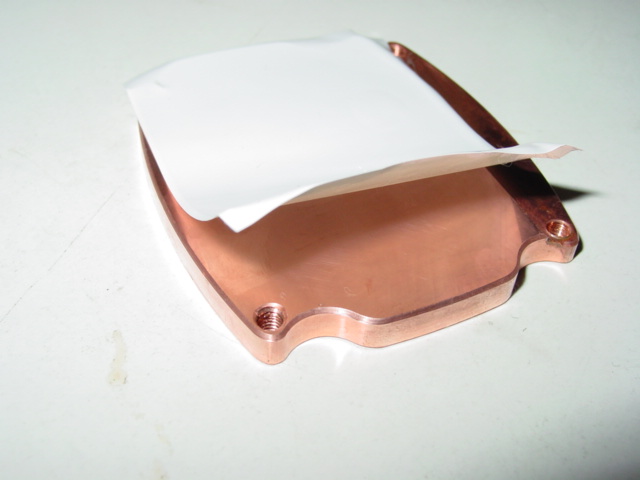
The block itself is composed of about 3mm thick pure copper. Is very well machined, judging from the thin micro-channels that were non-existent in the previous Universal WaterChill water block. The insides of the block are very smooth and have less machine swirling than some other blocks where you can easily notice the machining marks. Even the block itself deviates from the typical square-like appearance of water blocks, although I hardly think this has anything to do with actual performance. It’s clearly evident that Asetek invested in some good machines and machinists that can produce blocks like this. More information on their detail to quality can be found in their “10 Reasons To Buy a Waterchill” section of their website. Looking at the design, it is clear that the water enters through the restricted inlet onto the thin micro-channels (which is located just above the CPU-die) and then directed towards the sides for outlets. The bottom came protected with sticker that can peel off easily and revealed a very well-lapped bottom, although not exactly mirror like. I’d say it was lapped in between 600-800, which is more than sufficient.
Swiftech Packaging and Contents
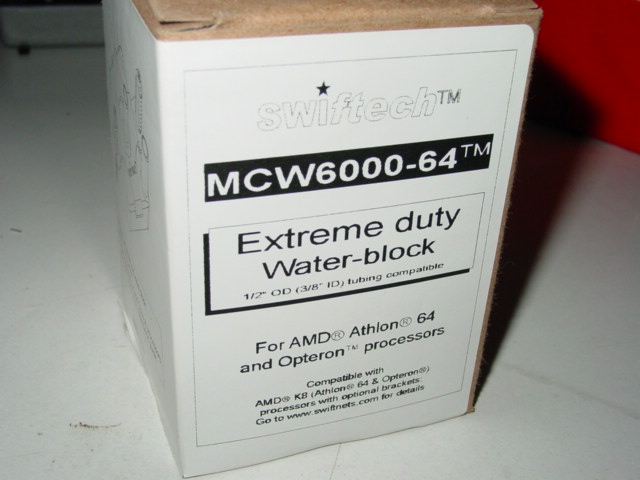
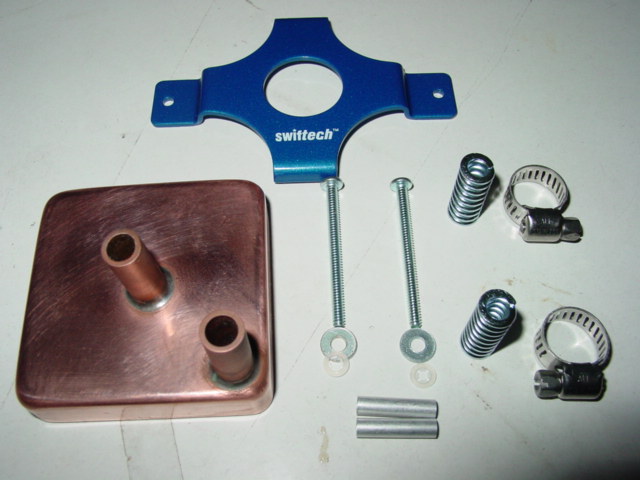
The Swiftech packaging that I received was picked up, so obviously it was never shipped. The packaging, although much smaller than Asetek’s, proved to offer enough protection for the block. The contents were wedged between pieces of Styrofoam. Swiftech also offered me an additional back plate, as they require that the MCW6000 only be used with a metal back plate and not the plastic ones used with some A64 motherboards. There have been reports of motherboards warping due to the plastic back plate’s inability to protect the motherboard from warping under heatsink or water block tension. Please note that the back plate must be purchased separately and does not come with the block. The entire contents include an instruction manual, all necessary mounting screws, the A64 mounting plate, 2 worm drive hose clamps, 2 plastic tube inserts, and the water block itself. Although not as abundant in goodies as the Asetek, we must remember the awesome price tag these blocks retail for.
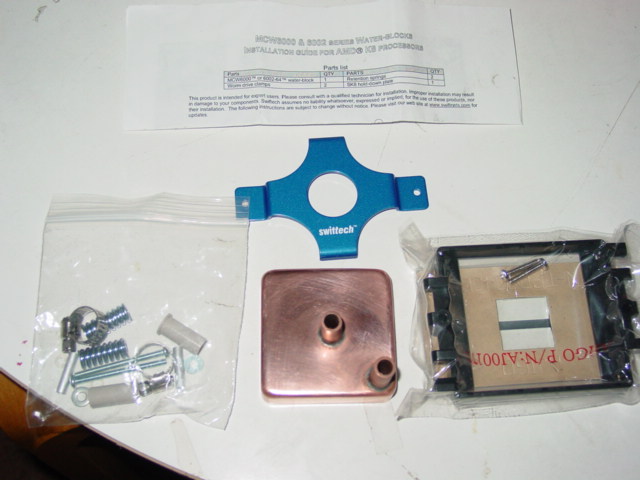
Swiftech Mount and Blocks
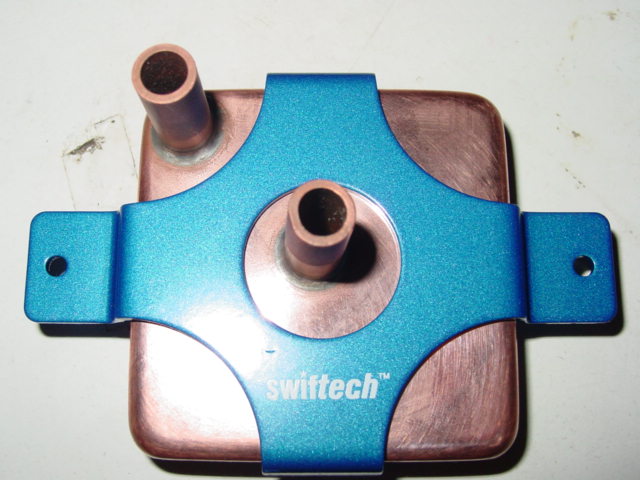
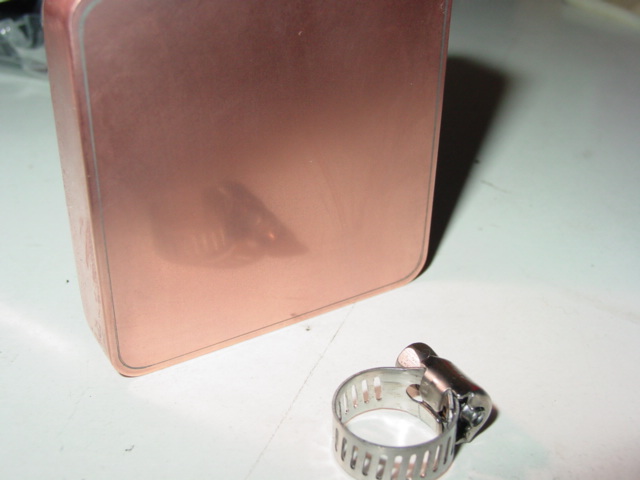
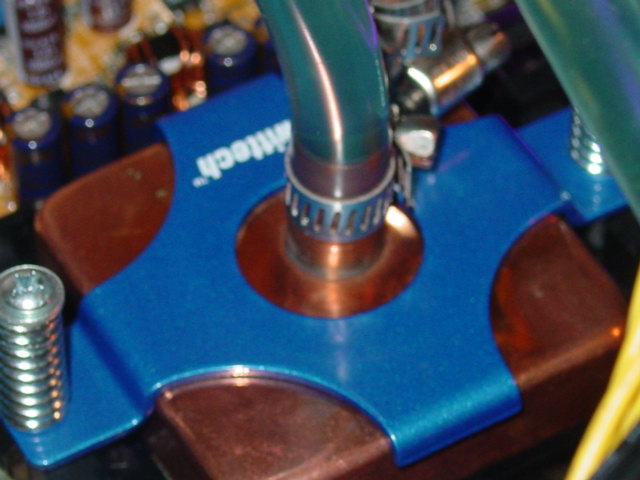
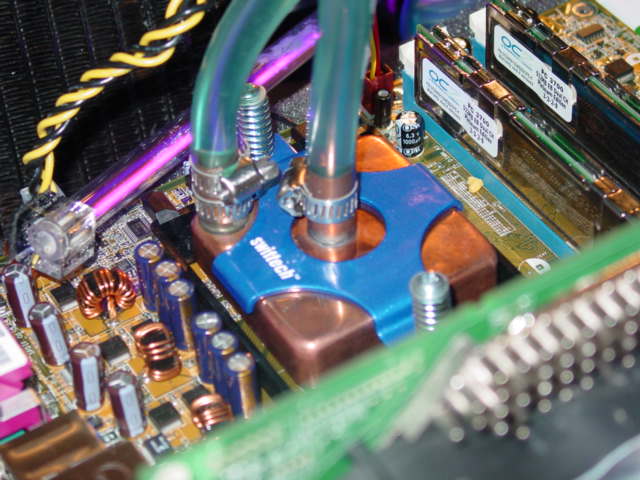
The Swiftech block initially isn’t very pleasing to look at in comparison to typical lucite topped blocks that we are so accustomed to viewing. However, we can be assured that no leaks will ever be present due to plexi tops cracking or O-rings not sealing. Also, the barbs are actually integrated into the block, so you need not worry about busting out some Marine goop as a safety measure. The mounting plate is a great addition because it can be easily changed to adapt to a new platform, even though it must be purchased for a small price. The outside machining is exceptional as well and judging from the transparent image taken directly from Swiftech’s website, you’d swear that the entire block was one piece the whole time. That is how good the brazing or soldering is on this block. I couldn’t get a good picture of the inside pins of this block, but the transparency sheds some light onto how the pins are symmetrically placed. This method may be a new innovation in water block design, as I have never seen a similar one before. It is definitely indicative of Swiftech’s dedication to novel and groundbreaking ideas. The base, as expected, is typical Swiftech lapping: always mirror-like and perfectly flat.
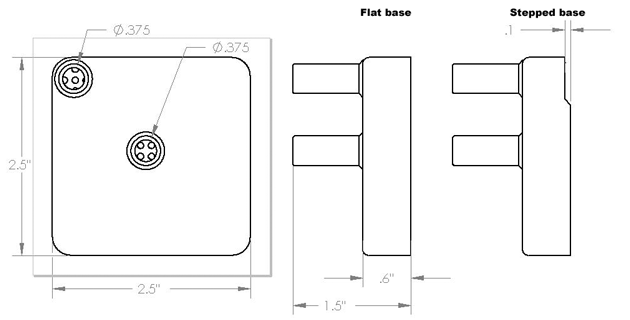
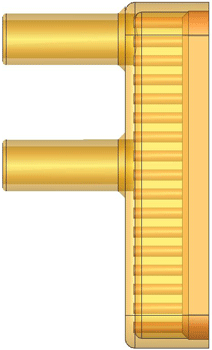
Although I said a new mounting plate can be purchased to adapt to a different platform, you must first refer back to the compatibility chart at www
Asetek Installation
If you have installed a water block utilizing standard screws, washers, and springs, then installing the Asetek Antarctica will be no problem. The only bad part is you need to take out the motherboard to mount the screws from behind which hold the threaded rods in place. Asetek has made the job easier by including huge thumbscrews to compress the springs into the block for tension. If any of you had second thoughts about ever using quick-connects as a method of connecting your tubing to the block, think again. I have never had any problems with existing Swiftech products that are known to incorporate quick-connects, and rest assured, the same goes true for the Asetek Antarctica. The block produced no leaks in the week I used it before this review.
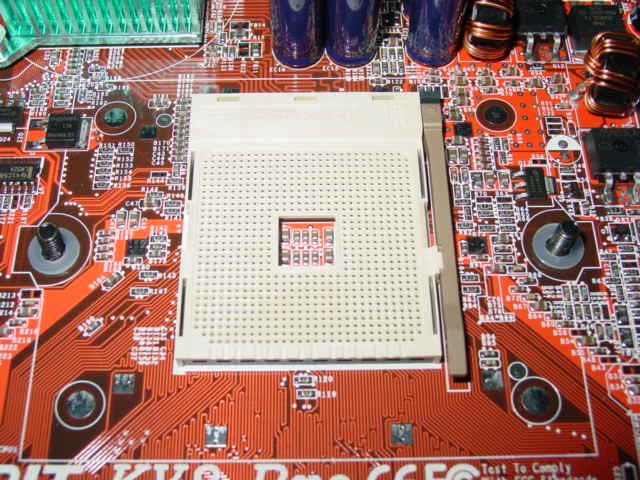
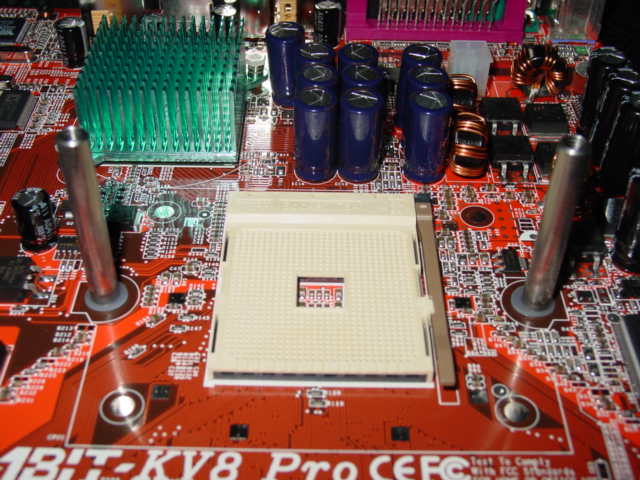
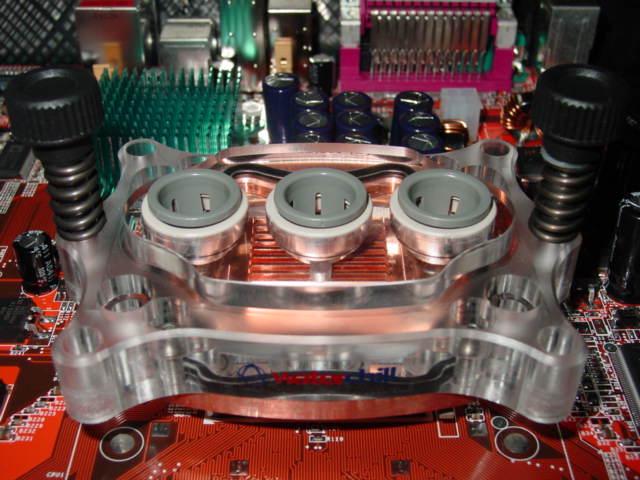
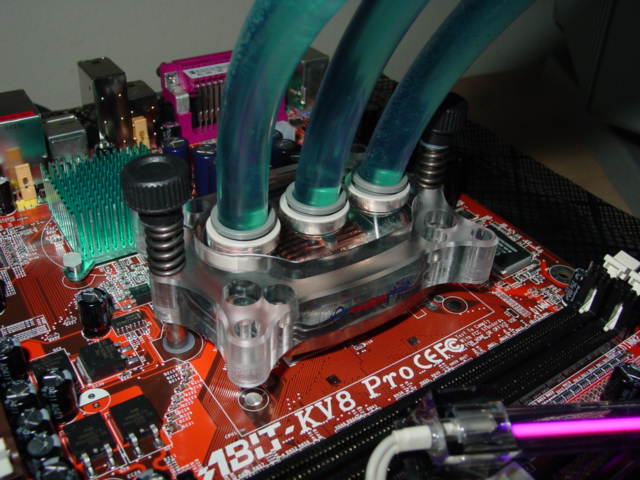
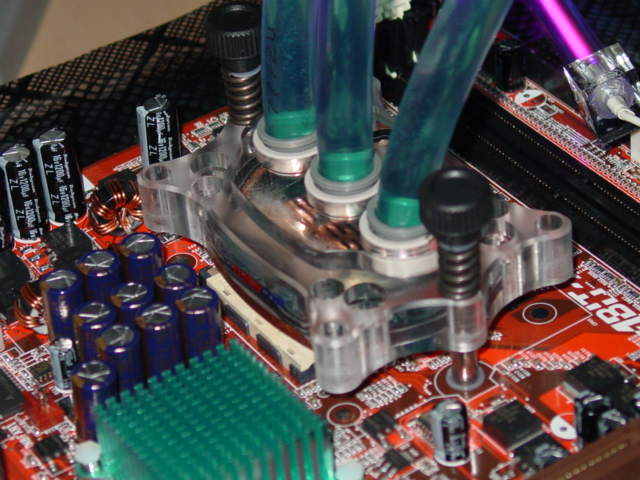
Here are some pictures of the Antarctica block installed with fluid running through. While the block is beautiful, I can’t help but notice how hard it would be to mount a 3 barbed block on a vertical mounting bracket. Especially on this KV8 Pro, unless the Y connector was placed farther away from the block than usual, the tubes won’t have enough flexibility to bend without hitting the edge of the case. Unfortunately, I conducted testing out of the case so I don’t have an illustration pointing this problem out. I will update this review illustrating this problem once I decide on a case.
Swiftech Installation
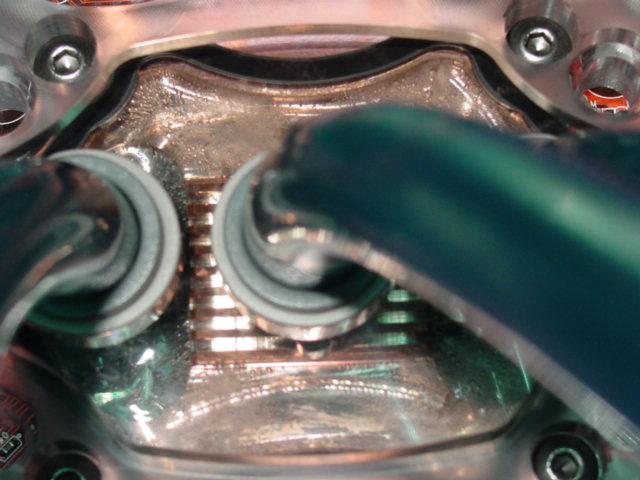
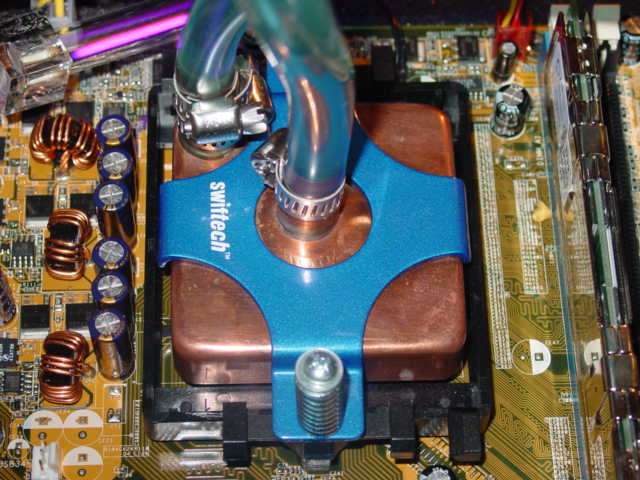
The MCW6000 installation for the A64 is pretty much foolproof, as it is only a matter of screwing the mounting plate into the holes of the existing back plate. Of course the back plate is metal one instead of plastic. Couldn’t all water blocks adopt this technique, as it makes life so much easier? One problem I did have while leak testing was the MasterKleer tubing that I had would not properly form an airtight seal once pushed over the pipes. I can easily push and pull the tubing over the blocks. This posed a problem later on, as no matter how tight I compressed the worm drive hose clamps, leaks would still appear. I managed to attach a piece of Asetek’s Tub Clair tubing which proved air tight, as it was a feat trying to pry out the tubing once it hugged the pipe. Notice in the picture the leak in the outlet but the lack of leaks in the Tub Clair tubing in the inlet. I alleviated this problem by utilizing two hose clamps at the outlet. If you plan on purchasing this block, I’d recommend buying Swiftech’s recommended KuriTec tubing. It is guaranteed to work without leaks with this block.
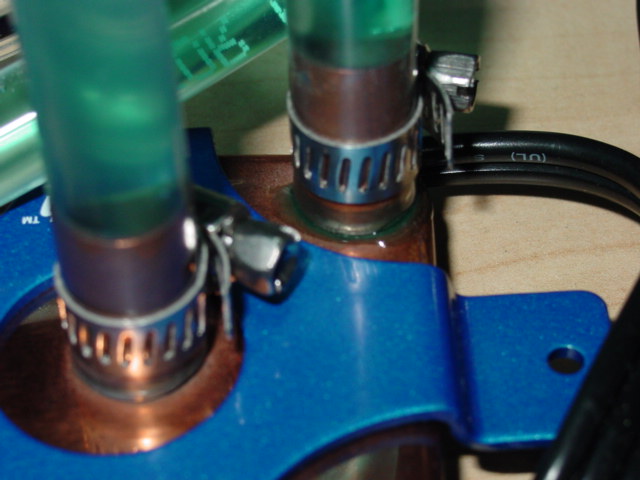
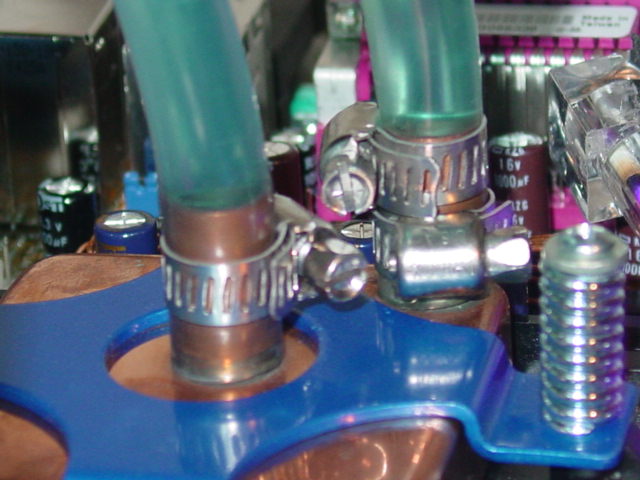
With the block installed in the motherboard, I’ve noticed that any end user would have no problem with tube routing, especially with 3/8”tubing. A 2 barb design is much more convenient to route than a 3 barb design. After the leak was fixed, I noticed no other leaks or problems after that.
Test Setup and Results
Test Setup and Method: Software: **-**Prime95 for 1 hour
All testing was conducted out of case on my desk with no fans, except for the fans within the Powerstream about 2 feet away from the motherboard. Testing was done primarily with equipment that any other typical end user would have access to: a thermal probe that was positioned on the side of the heatspreader on the Athlon64. Ambient temps were reported as 25 degrees Celsius (which deviated about 0.5 degrees) and taken with a Lian-Li temp probe on the other side of the room. Please note that I am testing these blocks in a manner in which any end user would do so; thus, the results should be perceived as end user results and not actual scientifically proven results. If you have any discrepancies regarding my testing method or this review in general, you can easily voice your opinion in our forums. For an air cooling comparison, I utilized the stock aluminum heatsink that came with the Athlon 64 3500+. I provided this part of the testing just to illustrate what a typical user could expect to see out of these blocks versus a stock heatsink.

Watercooling Specifications: -Black Ice Pro II Dual Radiator (from Sidewindercomputers) -Asetek Waterchill Reservoir with 1/2” OD quick connects -Asetek Hydor L30 II with 1/2” OD quick connects -MasterKleer 3/8” ID 1/2”OD 1/16” wall tubing -2 120 x 25mm Delta fans at 12v in Pull configuration I tried my best to choose water cooling components that a typical end user would purchase. This, I assumed, would be PC ready components such as a self-tapping Black Ice Pro II Radiator and an Asetek Reservoir/Pump combo with 3/8” quick connect fittings. I understand that more experienced DIY users would opt for a heatercore (such as a Chevette, Caprice, Bonneville, etc.), but I wanted to choose a commercial radiator for testing purposes. Also, I NEVER would restrict the inlet to a pump with 3/8” tubing, even if the entire setup was 3/8”. But again, for testing purposes, I imagined that an end user would not even notice the difference unless the user were more experienced. That said, this setup is nowhere near the “best” setup that most enthusiasts are accustomed to seeing and the results are relative ONLY to this setup. Any changes in the components can ultimately change the results of the water blocks themselves. So in short, while these results were achieved through my setup, they may not be the same for yours. I jumped a Vantec PSU to prime the Hydor pump, as the Asetek version can’t turn on without a power supply, and I used some Blue UV Dye from FrozenCPU to check for leaks. I also used some leftover VW Blue Antifreeze and some Crystal Lake Distilled Water to minimize any corrosion during testing. I used a 20 percent Antifreeze ratio.
If you take notice, the Asetek installation was mounted on a red KV8 Pro rev. 1.1 rather than the Asus A8V deluxe that the MCW6000 was mounted on. During testing I decided to do a hardware change as I was not attaining the overclock that I wanted with a Socket 754 3200+ CO and the Abit board. Nonetheless, despite the pictures of the Asetek being mounted on the KV8 pro, I still conducted all testing on the Asus board, but forgot to take pictures of the Asetek on the Asus board.
Results:
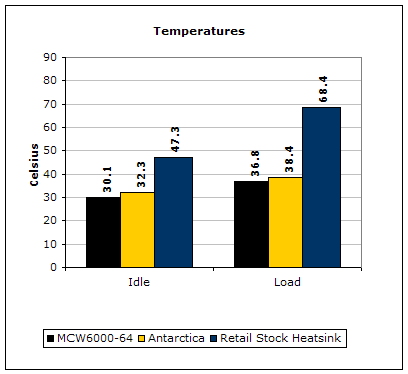
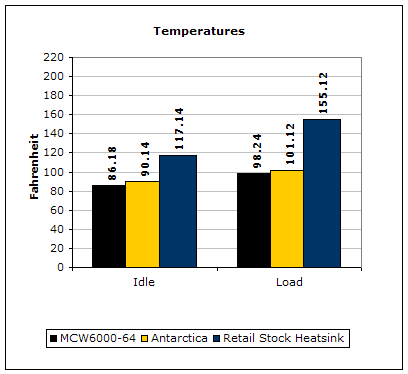
As you can see from the graphs, the temperature differences between stock air cooling and water cooling is drastic. At load temps, the difference is about 30 degrees Celsius for both blocks. This proves that you probably should not take your voltage over 1.6 volts on stock air cooling. The stock air cooling, while able to boot and function, never allowed Prime 95 to be stable after 1 minute (this is at a FSB of 235x11 and 1.7 volts). The overclocking results for both water blocks were the same with both maxing out at 245x11 for an effective 2.7GHz on an Athlon 64 while stock air cooling only allowed me to hit 2.4GHz prime stable. These are impressive results for a moderate water cooling solution. The actual blocks themselves performed similarly in terms of idle and load temps, but the MCW6000 was able to perform marginally better with no difference in overclock. However, the MCW6000 is a 2 barbed block which, in this test, performs better than a harder to route 3 barbed block. 3 barbed blocks have been proven in the past to perform much better than other 2 barbed blocks on the market (except for the exclusive Cascade block). Once again, Swiftech has proven themselves as innovators of simpler and more affordable yet better performing cooling solutions with their release of the MCW6000.
Conclusion and Thoughts
Aesthetically, the MCW6000 to me is not as nice as the Antarctica. I have always been a fan of clear tops for 2 reasons: 1. They are clear, so you can see if there are any visible problems within the channels and 2. they are removable, so cleaning the insides of the blocks won’t be difficult. The copper top on the MCW6000 is also troublesome, in that it is more prone to oxidization if not taken care of correctly. Although I managed to make it look better, it required constant cleaning. Unless I find a permanent solution to cover it up (like some kind of polish or clear coat), there is no way around this. The royal blue color against the copper top is also not my taste at all. It would be even better if they could release different colored tops, or even different colored topped MCWs. Aside from these differences, the MCW6000 is an excellent performing block that can be easily interchanged between platforms with the purchase of only a bracket, and is also relatively cheaper than other water blocks in its class. The Antarctica, however, also has its fair share of differences. A 3 barb design will always be harder to route than a 2 barb design. That said, with new Athlon64 setups, many users will find difficulty mounting a vertical 3 barbed block inside a case without having to use copious amounts of tubing. I’d imagine it would be much easier for a horizontal mounting bracket such as the MSI K8N neo series. Also, in the instructions it should be noted that a more rigid tubing should be used. Or similar to Swiftech’s approach, some kind of tube insert should be provided for use with softer tubing, as most end users love using Tygon or ClearFlex tubing. Lastly, if all waterblock manufacturers managed to use the stock mounting bracket on motherboards as a means of mounting installation, the world would be a better place. This means installation of a new water block wouldn’t require the motherboard to be entirely removed from an existing setup. Aside from these differences, for a price that is equal to most existing water blocks in its class, Asetek provides you with a well-performing block that can universally be used on all platforms without the purchase of extra hardware. The block can also be easily cleaned and mounted easily due to the removable top and easy to use mounting thumbscrews. In the end, while both blocks performed very well, I’d have to give the Insanetek “MUST HAVE” award to the MCW6000, due to its simpler 2 barb design, as well as for the use of the existing motherboard bracket for easier installation. The gripe I had about the leakage regarding use of different tubing for the MCW6000 can easily be alleviated by purchasing the quick-connect slide on fittings here, so that gives another nod to the MCW6000.
Swiftech MCW6000-64:
Pros:
- Outstanding performance
- Easier installation w/ 2 barb design
- Ability to change mounts among certain platforms
- All copper, fully integrated design
- Use of existing motherboard backplate
- Very affordable
- Excellent lap job ensuring full contact
Cons:
- No ability to easily clean the insides
- Smaller than usual tubing needed to prevent leaking
- All copper exterior prone to visible oxidization
- Not aesthetically appealing as other water blocks

Pros:
- Excellent performance
- “Universal” capability
- Robust packaging contents
- Excellent lap job
- Clear top allows visibility and cleaning ability
Cons:
- Does not use existing motherboard backplate
- 3 barbed design could prove difficult to route (especially in some Athlon64 setups)
- No tube inserts for use with softer tubing

We would like to thank Swiftech and Asetek for providing us the sample. If you have any questions or comments, feel free to hit us up in the forums. You can also check out more of our latest reviews on the front page.